
The Mini Mini Fridge Manual
The first mini fridge with real-fridge standards.
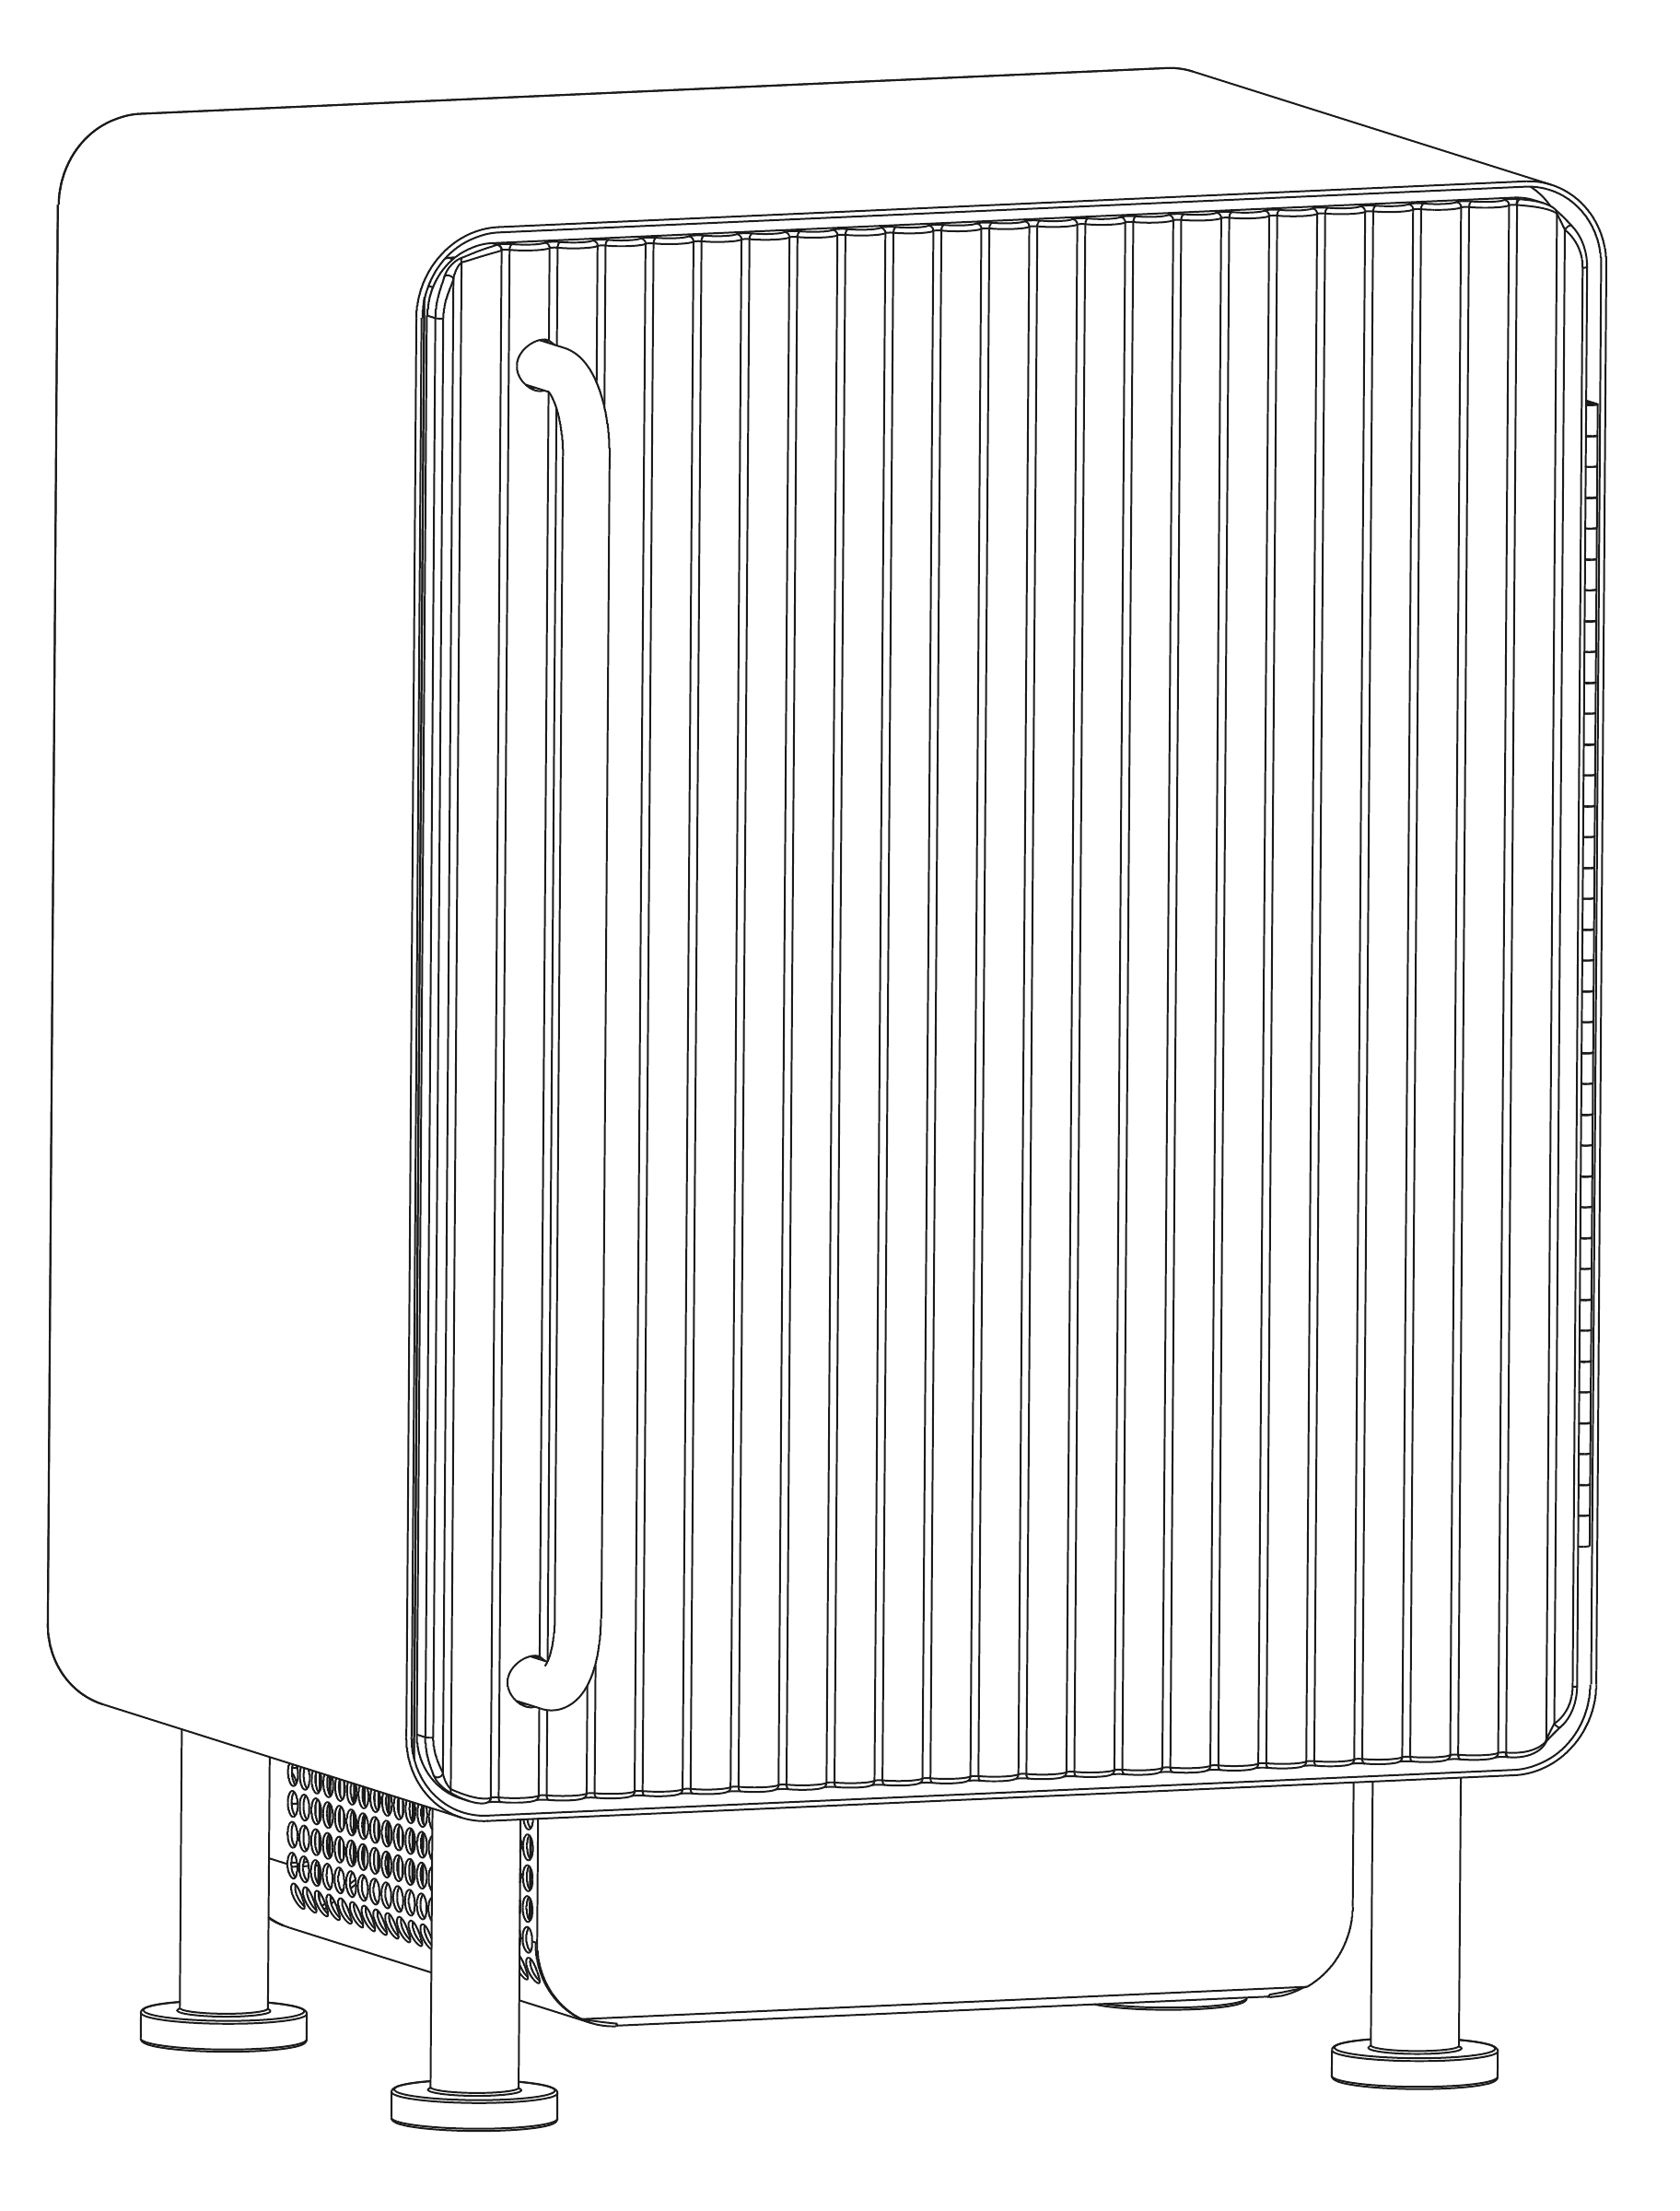
Meet your Mini Mini
Your favorites just found a new home. Bedside water. Desk side soda. A cold face mask. Plug it into a standard wall outlet and make yourself at home.
Need a hand? Shoot us a note: hi@roccofridge.com.
Specifications
| Model | MMDF-100-STS; MMDF-100-GRA; MMDF-100-GRE; MMDF-100-CRM |
|---|---|
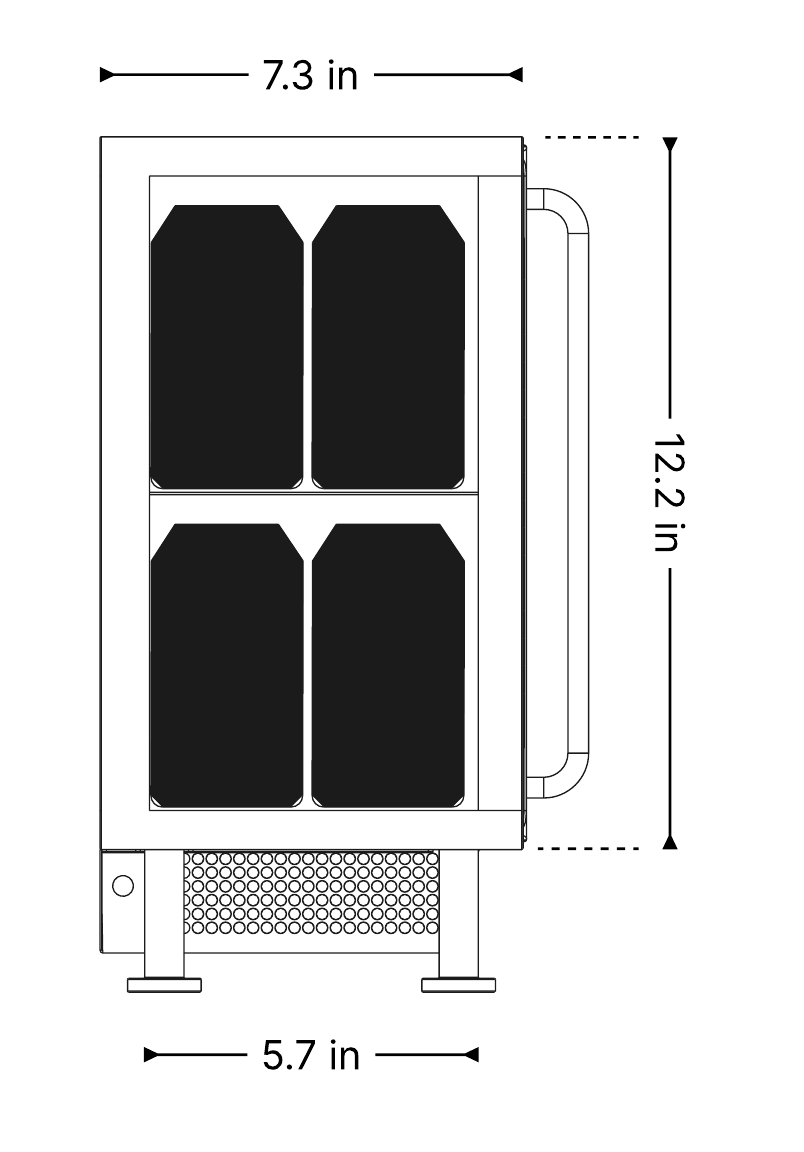
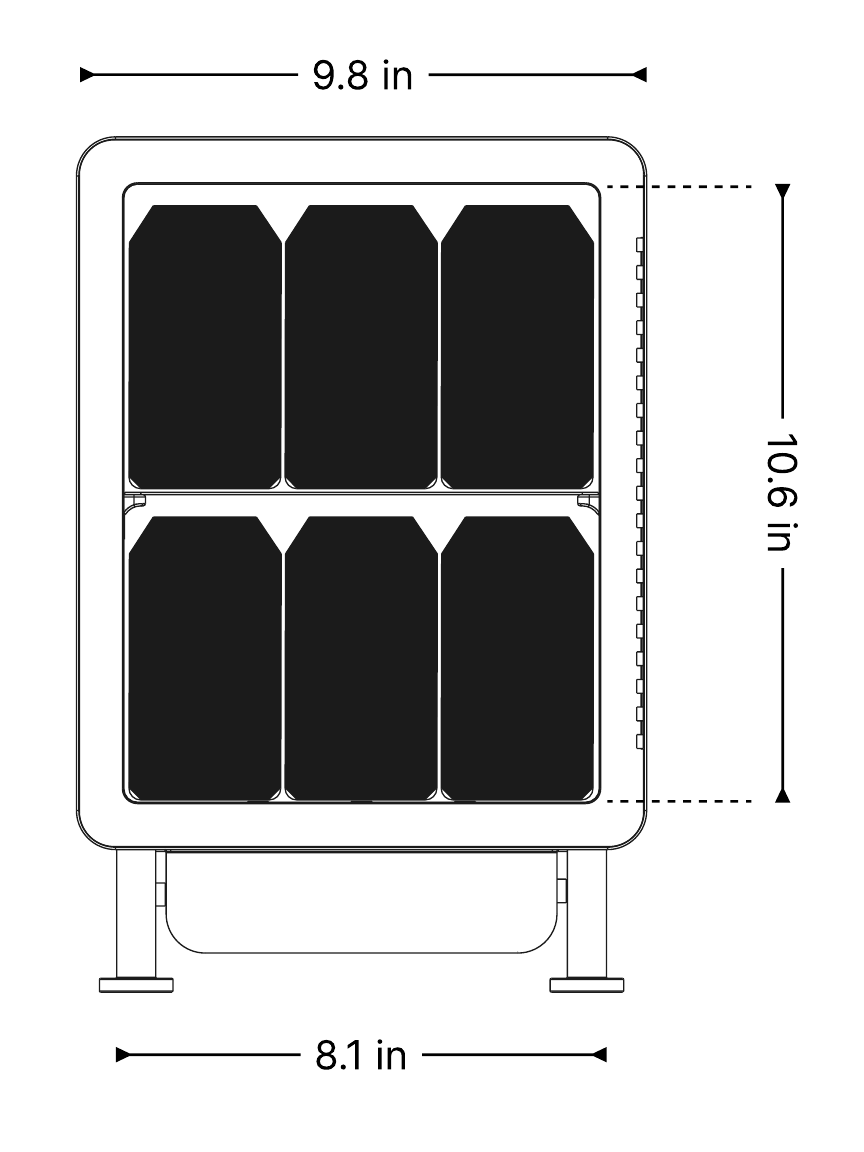
| Capacity | 12 standard cans |
| Input voltage (US) | 100-120 V AC, 50/60 Hz |
| Cool mode (US) | 108W, 6A |
Safety Information
A good spot for your Mini Mini
- Use indoors only. Do not use outdoors, in humid bathrooms, or in dusty or smoky areas as impurities can draw debris into the fridge and cause malfunctions.
- Place the fridge upright on a flat, stable surface. Do not lay, tilt, invert, squeeze or crush it.
- Store in a dry, well-ventilated place, away from direct sunlight, heat sources, rain, corrosive gases and liquids.
- Do not place heavy objects or water containers on top of the fridge.
Powering up safely
- Connect to a standard wall outlet using the AC/DC wall-mount adapter supplied with the fridge.
- Use only the power supply that came with your Mini Mini.
- Do not use a damaged power cord. Do not bend, stretch or pull the cable, and do not yank the cord when unplugging.
- To disconnect safely, turn off the switch on the bottom left side of the fridge, then unplug the cord (bottom right).
What goes inside
- This appliance is designed for beverage refrigeration only. It is not suitable for long-term storage of perishable fresh food or perishable beverages.
- Do not place flammable or explosive materials or volatile chemicals inside the cabinet.
A few more safety essentials
- Do not let children use the fridge without adult supervision.
- Something look or sound off? Turn your Mini Mini off and contact us at hi@roccofridge.com. We’ll help you sort it out.
Parts
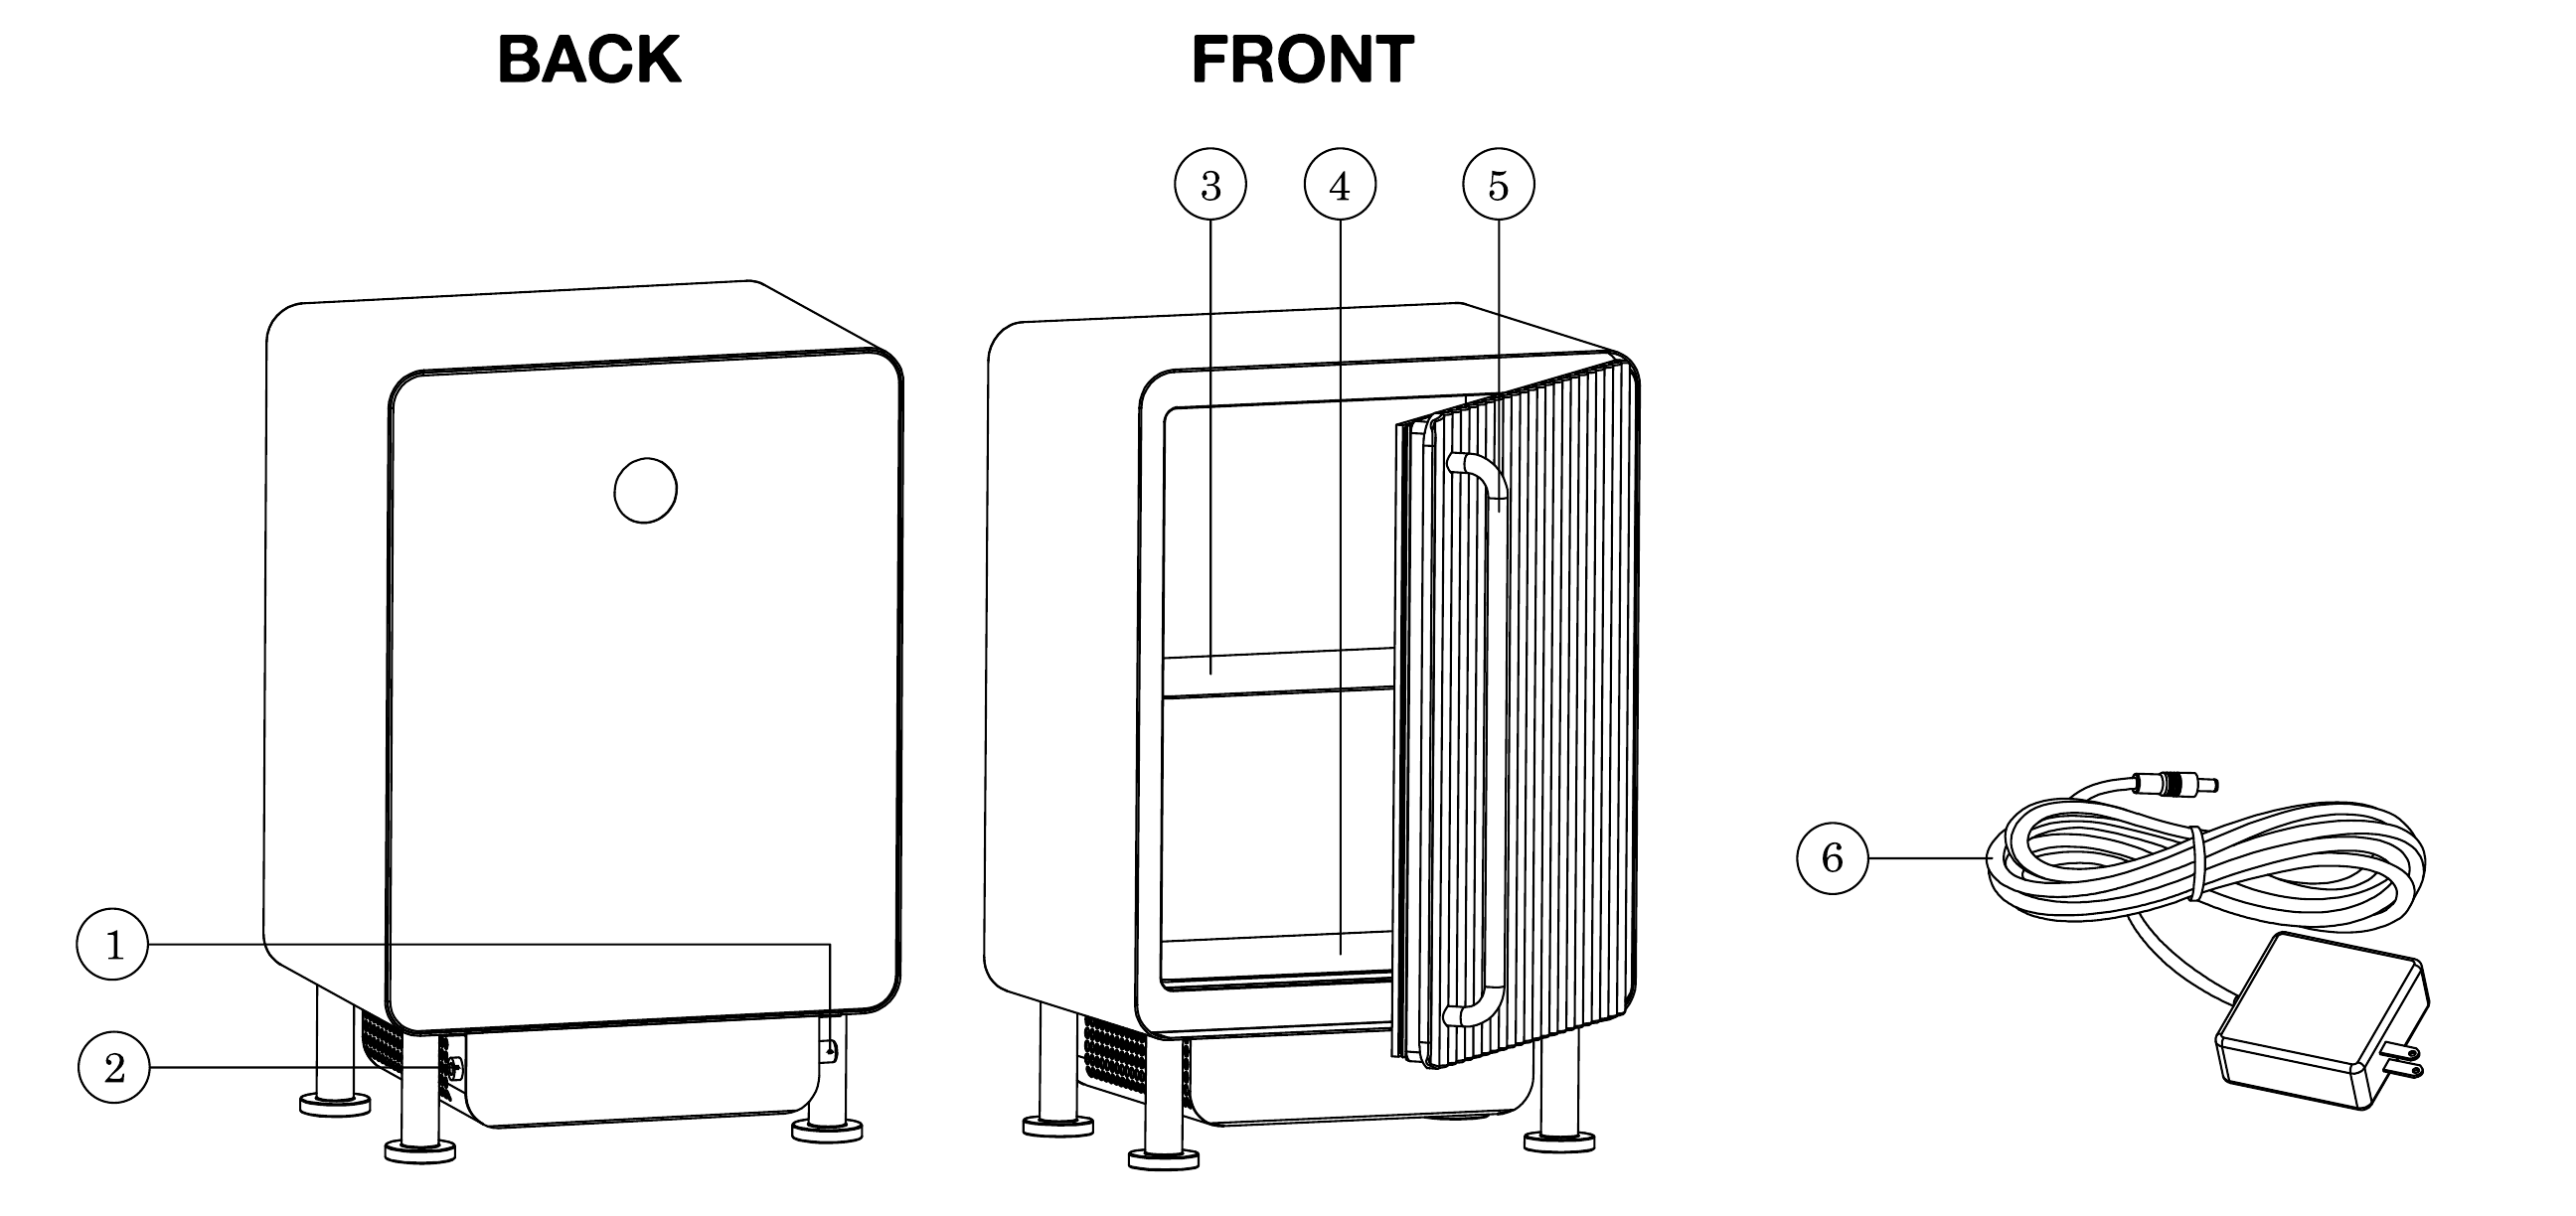
-
Off/cooling mode switch
-
Power plug
-
Removable middle shelf
-
Removable bottom shelf
-
Door handle
-
DC power cord
Dimensions
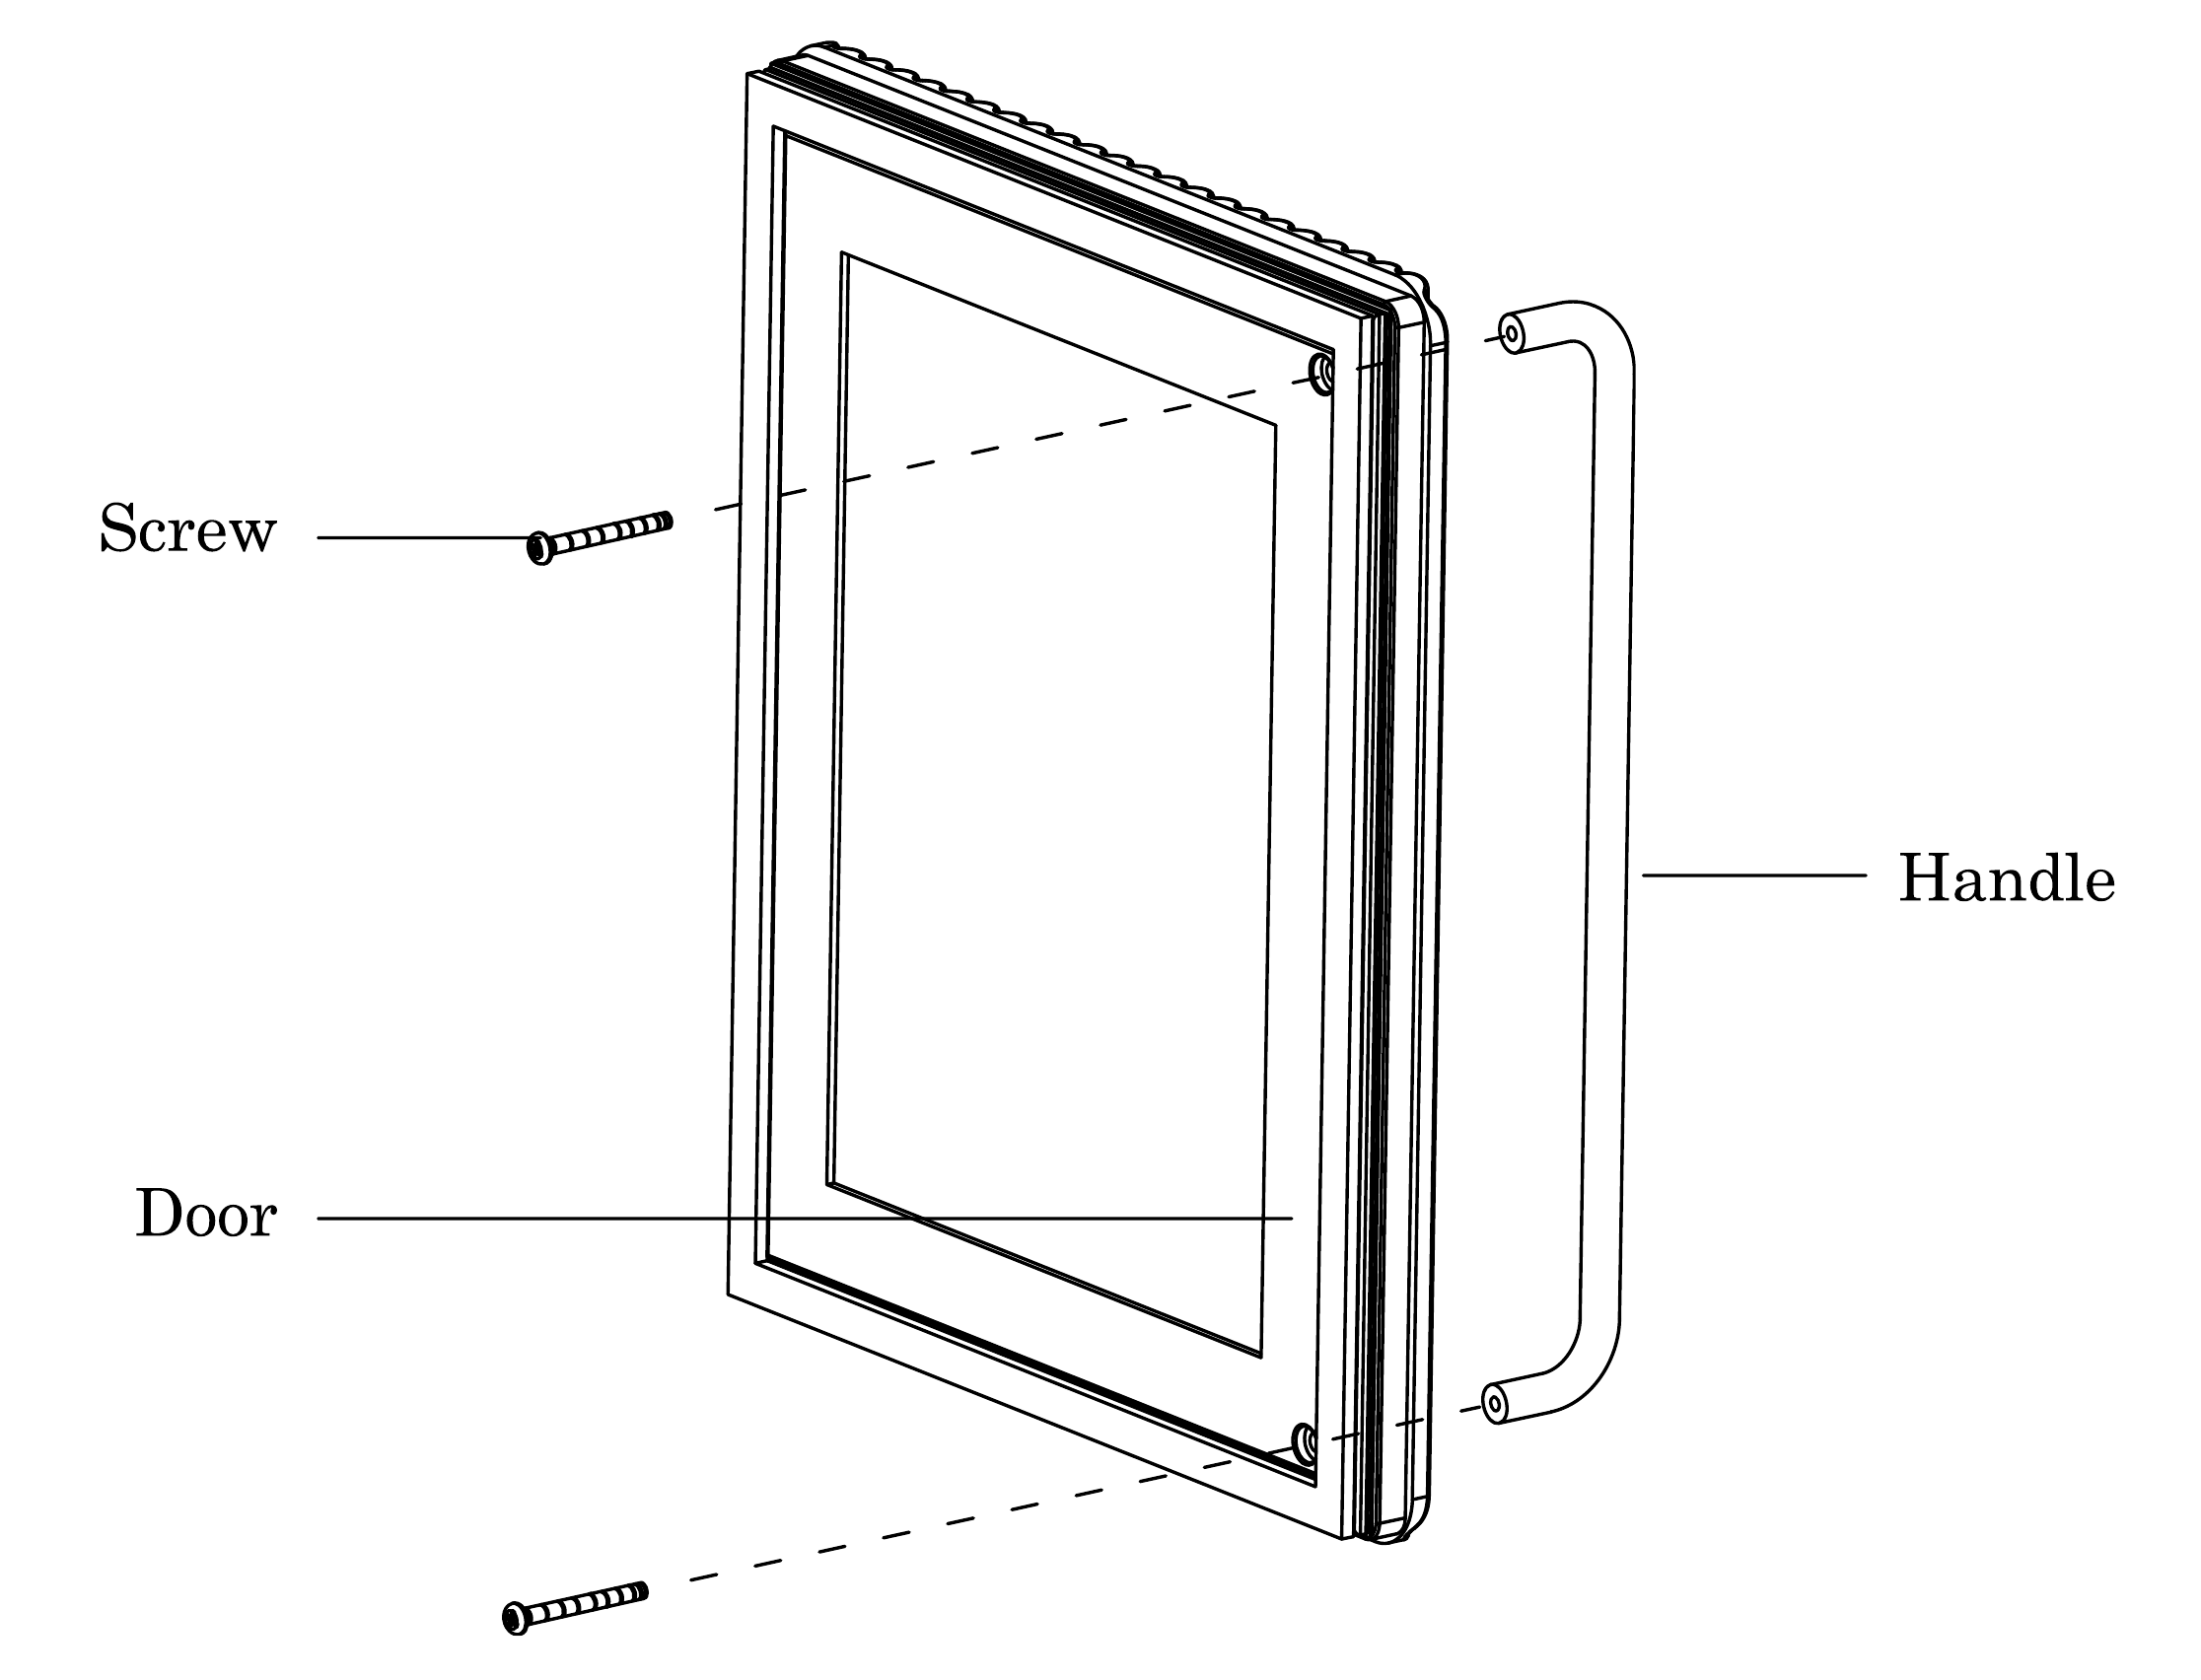
Attaching the door handle
- Unpack the handle, screws, and screwdriver. Everything you need is in the box.
- Find the two handle holes on the left side of the glass door.
- Open the door. Hold the handle on the outside, with the screws on the inside.
- Fit both ends of the handle into the holes. Insert both screws, leaving them a little loose.
- Once the handle is in place, tighten both screws fully.
- Give the door a try. It should open and close easily.
Getting started
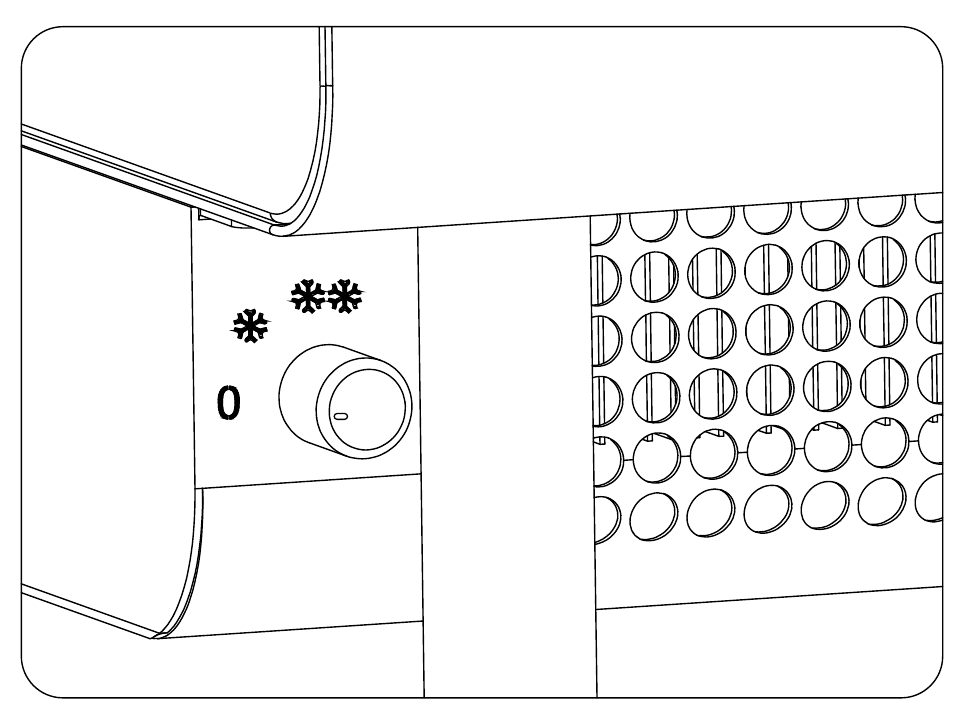
Set the switch to off
Before plugging anything in, turn the dial on the bottom left of your Mini Mini to off.
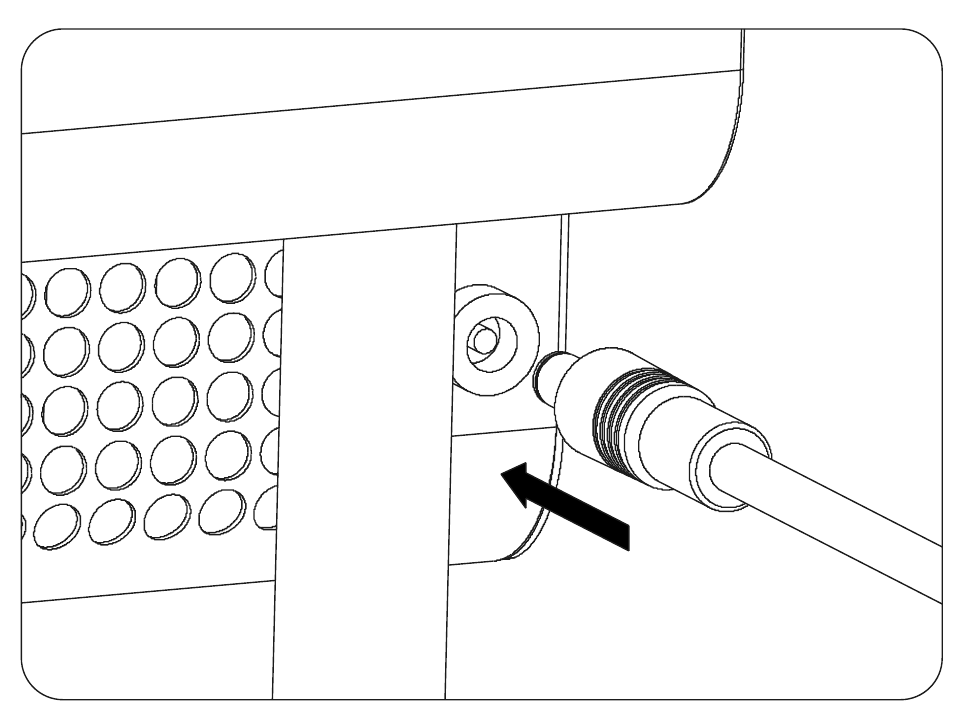
Connect the power cord
Connect the DC power cord to the power port at the bottom back of your Mini Mini.
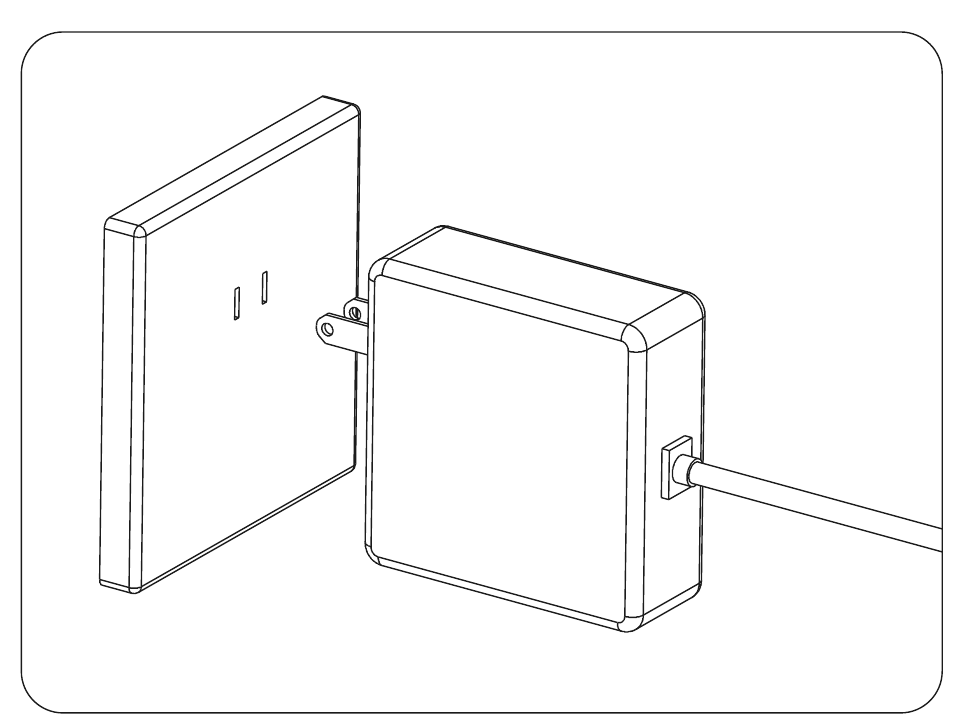
Plug into a wall outlet
Set your Mini Mini on a stable surface, then plug it into a wall outlet. Check that the outlet voltage matches the rating on the nameplate.
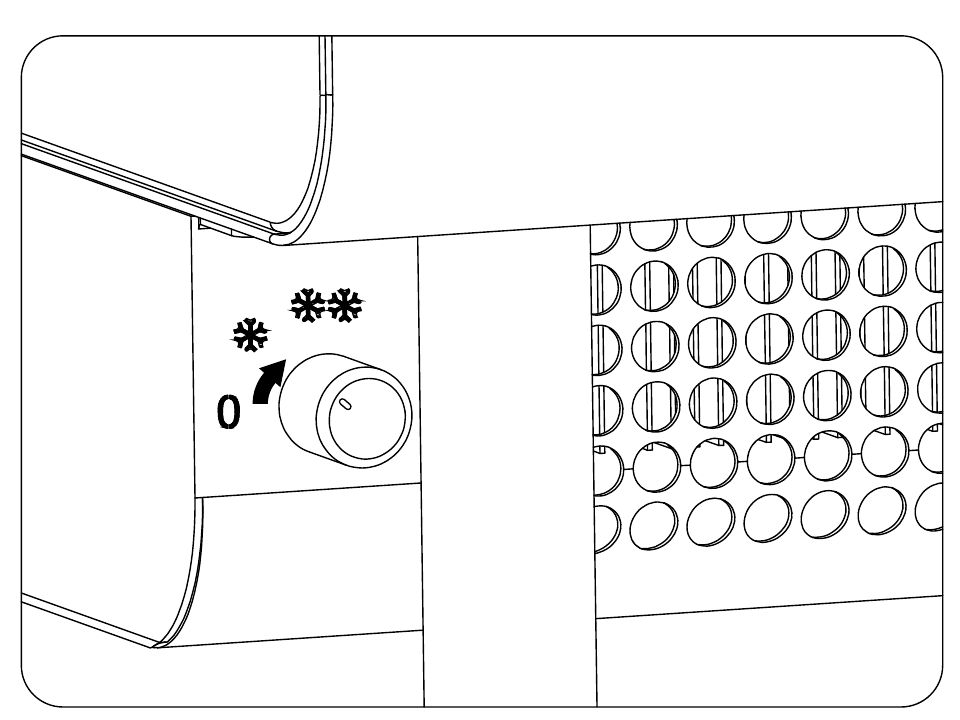
Switch on
Turn the dial on. The preset “❆” setting gives you gentler cooling and the quietest operation.
Cooling tips
Max cooling ❆❆ 39° F | Min cooling ❆ 50° F
- Keep your favorite drinks and skincare close. The Mini Mini cools beverages and cosmetic products. It is not recommended for perishable food. The Mini Mini uses thermoelectric cooling, so the temperature around it affects the temperature inside. Rocco tests cooling performance at a 71°F room temperature.
- For the best cooling performance keep the room below 75°F and stock it with drinks that are already cold. Give it 4 hours with the door closed to cool the whole cabinet.
A little care goes a long way
- Before cleaning, turn your Mini Mini off and unplug it.
- Take out your drinks and shelves. Using a soft, damp cloth, clean the interior with warm water and diluted soap. Wipe with clean water, and let it air dry.
- Skip abrasive materials and sharp objects, which can scratch the surfaces.
- Do not clean the cabinet with soap, scouring powder, gasoline, acetone or other organic solvents, hot water, or acidic or alkaline substances. These can damage the inner liner and shelf coating.
- For efficient cooling, regularly clean the vents and bottom fan cover with a dry cloth or vacuum.
- Give the door seal a regular check. Wipe away any dirt with a damp cloth.
- Taking a break? Unplug your Mini Mini, clean it thoroughly, and leave the door slightly open to help prevent odors and mold.
- Do not disassemble, modify or repair the unit. The manufacturer is not liable for damage caused by unauthorized disassembly, modification or repair.
Need help? Reach us at hi@roccofridge.com.
Need a hand?
No power?
- Check that the power cord is connected and the plug is fully inserted.
- Make sure the dial on the bottom left of your Mini Mini is turned on.
- Use only the AC/DC wall-mount adapter supplied with the fridge. Do not use any other external power supply.
- Check that the outlet works by plugging in another appliance.
Could be colder?
- Give it some breathing room: leave at least 2 inches on the sides and place it on a hard surface.
- Do not use the fridge in a high-temperature environment or near heat sources.
- Check that the door closes fully, then keep it closed for at least 4 hours so the whole cabinet can cool.
Seeing condensation?
- To avoid condensation, keep door openings brief and let warm or hot items cool to room temperature before placing them in your Mini Mini.
- Condensation can form on the outside of the glass door in humid or poorly ventilated places. This is not a product defect. Raise the fridge temperature or move the unit to a dry, well-ventilated area.
Sounding different?
- Check for foreign objects on the fan.
- Dust on the fan blades and cover can throw the fan off balance and block airflow. Clean the fan and cover with compressed air.
Recycling and warranty
Recycling
When your Mini Mini reaches the end of its life, follow local disposal guidelines and recycle the parts you can.
Your warranty
2 year limited warranty from Rocco.
Each Mini Mini Fridge is free from defects in material and workmanship. This warranty does not cover damage from neglect, misuse, contamination, alteration, accidents, or other abnormal operating or handling conditions. It covers the original purchaser only and is not transferable.
You can learn more about the warranty at: https://roccofridge.com/pages/warranty.
We’re here to help
Email hi@roccofridge.com or visit roccofridge.com.